Computer Science > Class Notes > Setting Up a Windows PC for Software Development Using Python. With Graphical Illustrations, Example (All)
Setting Up a Windows PC for Software Development Using Python. With Graphical Illustrations, Examples and Practrical Applications
Document Content and Description Below
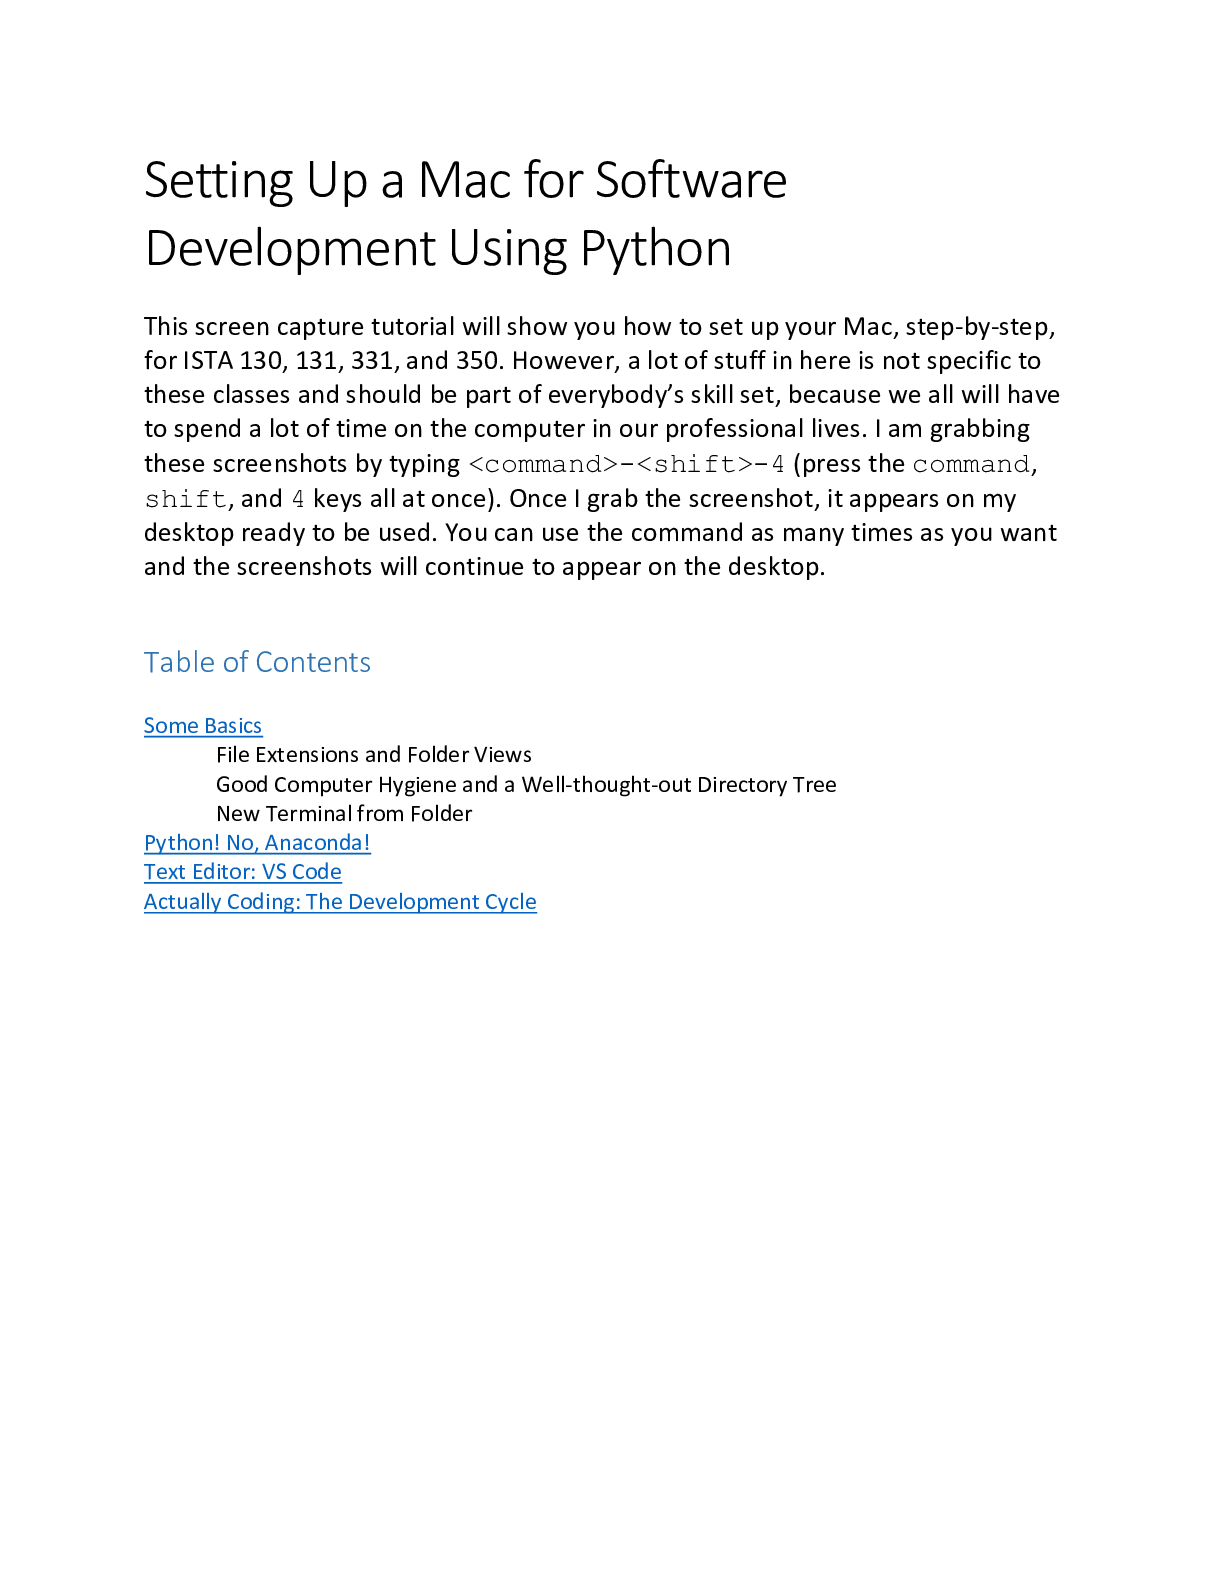
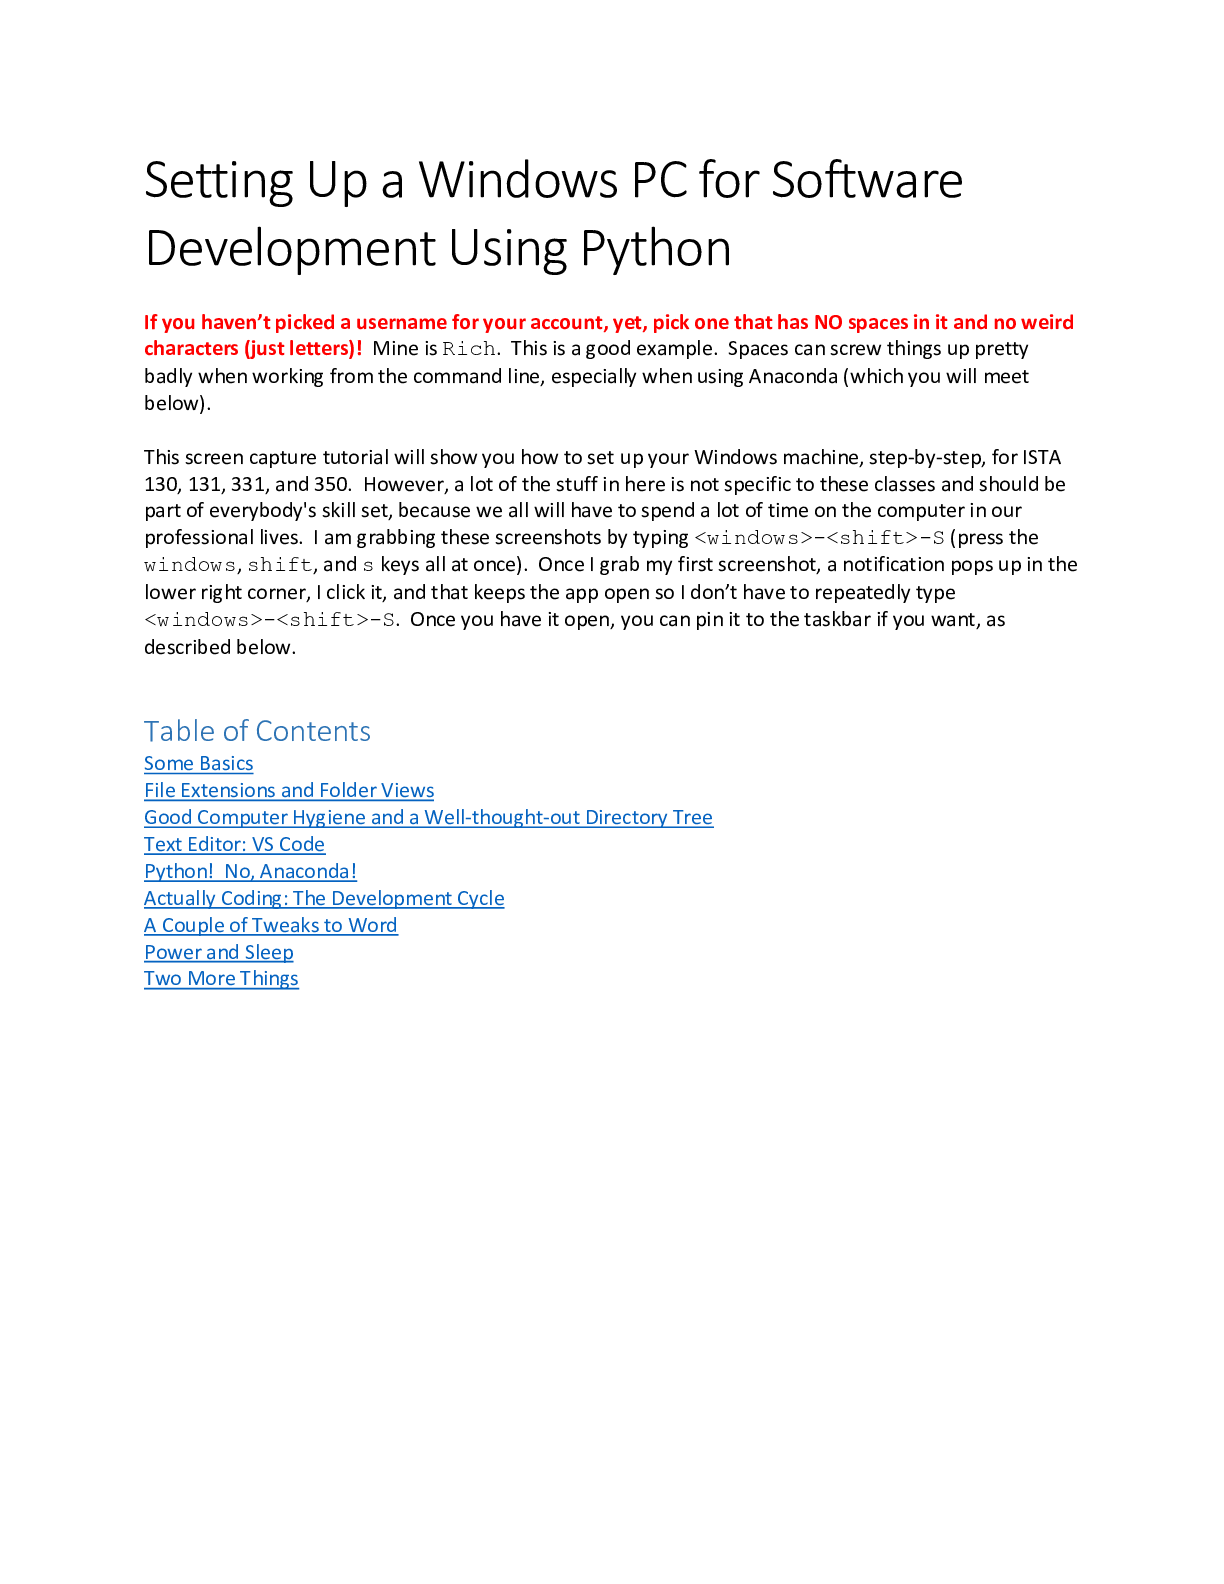
Setting Up a Windows PC for Software Development Using Python If you haven’t picked a username for your account, yet, pick one that has NO spaces in it and no weird characters (just letters)! Min... e is Rich. This is a good example. Spaces can screw things up pretty badly when working from the command line, especially when using Anaconda (which you will meet below). This screen capture tutorial will show you how to set up your Windows machine, step-by-step, for ISTA 130, 131, 331, and 350. However, a lot of the stuff in here is not specific to these classes and should be part of everybody's skill set, because we all will have to spend a lot of time on the computer in our professional lives. I am grabbing these screenshots by typing <windows>-<shift>-S (press the windows, shift, and s keys all at once). Once I grab my first screenshot, a notification pops up in the lower right corner, I click it, and that keeps the app open so I don’t have to repeatedly type <windows>-<shift>-S. Once you have it open, you can pin it to the taskbar if you want, as described below. Table of Contents Some Basics File Extensions and Folder Views Good Computer Hygiene and a Well-thought-out Directory Tree Text Editor: VS Code Python! No, Anaconda! Actually Coding: The Development Cycle A Couple of Tweaks to Word Power and Sleep Two More ThingsSome Basics First, let's change a couple of settings. Right-click on the background of your desktop and click on Personalize (at the bottom of the drop-down menu): If you like less white to take it easy on your eyes, click Colors, scroll down, and click Dark. If you really want to get wild, click on High Contrast Settings, turn them on, and see what happens! Or don’t. It screwed up an older machine of mine pretty good.Click on the Themes tab to the right of the Settings box: Scroll down; under Related Settings, click on Desktop icon settings: Defaults should vary for different Windows machines, but make sure that Computer and Control Panel will have icons on your desktop by checking them. These are not shortcuts – they function differently (better):If we look at our desktop afterward, we see the Control Panel and This PC icons: Double-click the Control Panel icon to see how Windows displays your Control Panel. The drop-down menu in the upper right corner (illustrated below) provides a few display options. I prefer the Small icons setting. Note also the location of Programs and Features, a useful button for future reference. The ribbon at the bottom of your screen is called the taskbar. It shows what programs you have open (icon with blue bar underneath) and allows one-click access to programs you use a lot. So let’s pin Excel to it, so we have fast access to it. First let’s find it by typing Excel into the search box in the lower left-hand corner of your screen: Type enough letters that Excel becomes the top selection and click Pin to taskbar:We now have an Excel icon on our taskbar for one-click startup: Let’s set it so Windows apps always show the vertical scrollbar on the right-hand side. We can open Settings with <windows>-I or we can click on the windows icon in the lower left-hand corner of the screen. The Start menu pops up. Click on the gear icon (the universal symbol for settings). Click Ease of Access, then Display on the left, then scroll down on the right until you see Automatically hide scroll bars in Windows and turn it off by clicking on the oval:File Extensions and Folder Views To see the expanded ribbon on a File Explorer window, you may have to click the down arrow (check out the current iteration of dark mode!): File extensions are the part of the filename that comes after the last dot in the filename, such as docx, pdf, xlsx, etc. By default, both Windows and Mac hide file name extensions from us. This is bad. So we want to change our settings so the file extensions show up as part of our filenames. To do this, click on the View tab at the top of any File Explorer window, and click the check the box next to File Name Extensions. Also, if you want, you can uncheck Item check boxes to get rid of the little boxes that pop up at the beginning every folder/filename in the folder. I am not a fan of those things, but that's just me. I also check the Hidden items box (back to light mode). You can also change the layout of your folder window in the View tab. I like the List setting, but your window will likely be set up differently and you should set it based on whichever layout you prefer:Alternatively, to make other changes to your folder display, click on Options -> Change folder and search options. Then click the View tab in the Folder Options window that appears and make changes in the bottom section of the box. I like to make sure that any hidden files are showing and you can also deselect the Hide extensions for known file types option. Also, check the Display the full path in the title bar box: Once you have a folder set the way you want all your folders to look (with extensions and, maybe, hidden files showing, perhaps on List view) you can select Apply to Folders. It won’t change for every folder – for instance, if you do this in Documents, you will have to do it again for Pictures folders. When I double-click on a pdf, by default it opens in a browser! I don’t like that. So let’s change the program associated with the pdf file extension. Open Settings (see Some Basics). Click Apps, then Default apps on the left, scroll down to Choose default apps by file type on the right. Scroll down to .pdf, click on the current program (Edge in this case), pic the one you want on the drop-down menu (Adobe Acrobat, in this case, since I have it on my machine), and click Switch anyway when Windows tries to talk you out of it: We could also do all of this from Control Panel.Good Computer Hygiene and a Well-thought-out Directory Tree Documents and Downloads are accessible pretty quickly through the Start menu, but let’s put shortcuts for them on the desktop. Double-click the This PC icon on the desktop and then right-click on Documents. We want to create a shortcut to get to our Documents folder on our desktop. Click Yes when asked if you want the shortcut to be placed on the desktop. The right-click menu is also called the Context menu. A Downloads shortcut is also handy. Now we can double-click the shortcut to open directly to your Documents folder. The program that allows us to view the contents of folders in nice windows and navigate between folders is called File Explorer. But instead of saying "the File Explorer window displaying the contents of Documents", I will just say "inside Documents", leaving it to the reader to gather the context, i.e. that I am referring to a window displaying the contents of Documents. Now we want to make a folder inside Documents for our class (I'll use ISTA 130 in this example). It is vital to learn good computer hygiene: how to organize our file system in a logical way so that our thinking can be clear. And to clean up stuff we don't need anymore. I sometimes see students do the entire semester inside their Downloads directory. This is a disastrously bad idea. Don't do it. To make a folder inside Documents, click the New Folder button:Once the new folder appears, we can start typing and name it whatever we want: Notice the underscore I put in the name to avoid spaces. It is easier to avoid spaces in directory (a synonym for folder that you need to know) and file names because we will be learning something called the command line, and the command line works better without spaces in names. Alternatively – you can right-click on the background of the folder window and then mouse-over New and then click Folder to create a new folder inside Documents:Now we can double-click on the new folder to go into it and the location at the top (we call this the “path” – we added it to the title bar of our window in File Extensions and Folder Views) will change: We can navigate back, forward, and up one level using the arrows, or directly to any directory on our path by clicking on that folder in the clickable address bar: Inside our ISTA_130 folder, we want to make more folders because we will have lots of materials and we need to build a reasonable directory tree to hold those materials. We could make these folders by rightclicking the window background or we can click on New Folder, as illustrated above: Make folders for each of hw1 through hw10, one for the ppts, one for example code, etc. Or better, make one called hw, and put the hw1, hw2, etc. folders inside it. You can move existing folders by drag and drop or by using the cut and paste options on the right click menu, also called the context menu. If you make a mistake doing stuff, undo it with <ctrl>-z. This works a lot of the time, but not for everything. Now let's make a shortcut on the desktop to the ISTA_130 folder. If you are in the ISTA_130 folder, drag and drop the folder from the clickable address bar to the desktop, and Windows will create the shortcut. If you are in Documents, right-click on ISTA_130 and create the shortcut as we did for Documents and Downloads. Windows will put it in the folder, not on the desktop, so you will have to drag it there.We want to keep our Downloads folder clean. Anything we want to keep, we move somewhere else. Suppose we go to the class D2L site, click Content, then Code (or wherever our instructor tells hello_world.py is), and download hello_world.py by clicking the down arrow next to it, scrolling down, and choosing Download. Edge actually has better downloaded file management, but I use Chrome, so I click Keep at the bottom of the browser window: Click the up arrow next the filename (it will turn into a down arrow) and choose Show in folder: This will open the Downloads folder with the file highlighted. Drag it where you want it:As soon as we're done, we can see the file disappear from Downloads, which is good – we haven't inadvertently made a copy. It’s a good idea to keep the Downloads folder clean – go through your Downloads folder occasionally and delete the stuff you don't need, and put the stuff you want to keep somewhere else.Text Editor: VS Code Now that we have our computers ready for the course, it’s time to install the software we’ll be using this semester (and some extra). The first thing we need to download is a text editor. The text editor is how we create our code. Then we will run it from the command line (more on this later) and see what goes wrong. We'll fix the current problem in the text editor, then run it again to what else goes wrong. We'll repeat until our program works. This is our development cycle. I have a new computer and I am trying a new one, Visual Studio Code, also called VS Code. So this part of the tutorial will probably get more complete as I get experience with it. Let’s download it. Go to the highlighted address or google vs code. Click on Download for Windows Stable Build: I’m in Chrome, so I click on the little up arrow (which becomes a down arrow) next to the downloaded file in the lower left of my browser window and choose Open:In the pop-up window, click the I accept the agreement radio button, Next, Next (let your machine choose where to put it), Next, then on the following window check all of the boxes before hitting Next: On the following window, click Install, finally Finish. By default, VS Code inserts spaces instead of the tab character when you hit the tab key. Do not try to change this. I like to see my whitespace, so I hit View, then check Render Whitespace:Here we have two files open in the editor in different tabs (we say that the one whose contents we can see has focus): Sometimes we want to look at files side by side, so type <ctrl>-<alt>-<right arrow> to split the display and move the file with focus into the new pane: Notice that test.txt has a round button next to it, but test2.txt has an x next to it: This means that test.txt has unsaved changes. Either way, you can close the file by clicking on the button. VS Code is unusually good at protecting your work, but you should still save your work frequently. If you want, you can configure VS Code to autosave (I’ll leave it to you to figure that out). Click File, then New. Then File, Save As… (or <ctrl>-<shift>-S). Choose a filename that ends in .py. VS Code will inform you in the lower right-hand corner that the python extension is not installed and give you the option of installing it. Do so. Decline to install pylint, if that option comes up. It will get installed with Anaconda (next). DO NOT INSTALL PYTHON ISTSELF FROM VS CODE, if that option comes up. It is not the end of the world if you do, but Python will also get installed with Anaconda and we will finish up configuring VS Code after that. To print from Code, I recommend this.Let’s look at a couple of the cool features of VS Code: If we click next to a parenthesis, it highlights the parenthesis itself and the matching parenthesis by putting it them in little boxes. This is really handy, because the most common Python mistake is to leave off a parenthesis. If we click next to the first one, no boxes appear because it has no matching paren: Notice a couple of other things – VS Code knows Python, so it color codes reserved words, built-in function names, etc. Also, I changed the default color scheme. Do this by clicking File, Preferences, Color Theme (if your window is too small, the menus won’t work right): More: https://code.visualstudio.com/docs/editor/codebasicsIf you want to turn off VS Code's highly irritating desire to change the indent level of everything you copy and paste, click on the settings icon in the lower left corner and choose Settings from the popup menu. Click Text Editor, scroll down, and unclick the Auto Indent checkbox (which doesn't show up well on this screen capture): You can zoom in and out with <ctl><shift>+ and <ctl><shift>-. You can switch between tabs (files) with <ctl><pageup> and <ctl><pagedown>. This is really handy when you have so many files open that some of their tabs have disappeared.Python! No, Anaconda! We will now install Python (plus most of what you need to do data science using Python) in a huge package called Anaconda: When I went here, for some reason it showed up with the mac distro. If that’s the case, click the highlighted Windows button, then download Python 3.7 and run the installer: Click Next, I Agree, Next, Next (let the machine decide where to put it). Make sure you check the box labeled Add Anaconda to my PATH environment variable, THIS IS IMPORTANT! Don’t worry about the scary red warning message:Click Next when Anaconda is finished installing, then Next (stay away from PyCharm, please), then Finish (you can uncheck the Finish window boxes first if you want). Let’s see what we have wrought. We are going to open a command line window. A command line allows you to interact with your computer through text commands instead of pointing and clicking at graphical user interfaces (GUI’s, pronounced gooey). This is awesome!! Windows has two command lines for interacting with the operating system (OS). Let’s use PowerShell. Open a File Explorer window for a directory of your choice. Click File, then Open Windows PowerShell. It may turn that in some cases you need to mouse over Open Windows PowerShell until the side window pops up and pick Open Windows PowerShell as administrator.Type the command conda list at the prompt: ... Holy crap, look at all of those modules! This is called the SciPy stack. Then I used a funky PowerShell command to count the number of lines in the output from the conda list command. PowerShell’s scripting language is amazingly cumbersome – what a piece of junk. Since there were 5 header lines in the output, I have installed 259 packages. But let’s add another good one: A lot of stuff spews forth. Hit Enter when asked if you want to proceed. Wait while everything happens, and some of it will be weird. Let’s make sure it’s really there. Type Python to open the Python interpreter or shell. It is also a command line because we can interact with the interpreter by typing text commands (Python instructions, in this case) one at a time to see what they do. This is a great tool for helping us develop our code. We call this interactive mode. We know we’re in the interpreter instead of the PowerShell command line because the prompt is 3 arrows, >>>:We can see a couple of important things. First, we’re running the Python we thought we were. Second, we successfully imported ijson (otherwise, there would have been an import error). To get back to the PowerShell command line (which I will usually just call the command line), type <ctrl>-z. Let’s finish configuring VS Code. The bottom of the screen will look like one of these: Either way, click in the lower left corner and choose the Anaconda Python from the menu that drops down: Mine is already showing Anaconda Python as the current Python for VS Code because I clicked through before I thought to make screenshots. Once we have finished this, we are ready to start coding!Actually Coding: The Development Cycle VS Code can powerfully help you debug your code, but I would like you to learn to do it the way I am about to show you before you experiment with those features. Our development cycle will be to create a Python program in the text editor (VS Code), then run it from the command line. We will certainly get error messages. We will change the code to fix the errors in VS Code, save the changes, and run it again. Repeat until the program works. Once you’re good at this, then you it’s ok to go onto using tools that insulate you more from the machine like integrated development environments (IDE’s). Let’s go through the process. Make a new file in VS Code: File -> New File, File -> Save As, name it hw.py (short for hello world). Type this code into the file: Save the file (<ctrl>-s or File -> Save). Open PowerShell from the folder containing the file: The path showing in your PowerShell prompt must match the path to the file as shown in VS Code. This will happen if the path to the folder that you use to open PowerShell matches. All of these paths arehighlighted above. It is an extremely common mistake to have more than one copy of a file with the same name in two different folders, so you end up editing one and running the other. The symptom is that you keep changing your code but you still get the same error messages. The folder that PowerShell (or any program) looks in for files by default is called the current working directory (CWD) or just the working directory. The path to this directory is in the PowerShell prompt. Repeating the previous paragraph with this jargon: PowerShell’s CWD must be the same as VS Code’s CWD. To see what’s in PowerShell’s CWD, use the ls command: Now we have a little Python program/script/module/file (words I will use interchangeably). Let’s run it from the command line using the python <script name> command. This is called script mode (as opposed to interactive mode, which we met earlier – what is the clue that we’re in interactive mode?): Now get back to our editor, add a couple of lines of code, hit ctrl-s to save the changes, click on the command line window, hit the up arrow, which takes us back through our command history so we don't have to retype commands all the time, and rerun the program. We can see the effect of our changes:We successfully created, run, modified, and rerun a simple program in Python! Yay! We’re on the way.A Couple of Tweaks to Word Python hates fancy quotes, and therefore we do, too. Let’s tell word to use straight quotes. Open a Word doc, File, Options (bottom left), Proofing, Autocorrect Options, click the AutoFormat tab, uncheck the "Straight quotes" with "smart quotes" box. Then you have to do it again in the AutoFormat As You Type tab! We would like to prevent Microsoft from tricking us into saving stuff on their Cloud service (well, I would for sure). Click on File and then click on Options. In the Word Options window, click on Save. We want to make sure that the box for Save to Computer by default is checked to make sure that the Computer doesn’t automatically save to OneDrive. Then click OK:Power and Sleep Now we are done with everything that is necessary, but here are a few more conveniences/extravagances. I don’t like having to log back in if I ignore my computer for a few minutes, so I’m going to change my power settings. Type <Windows>-i to open Settings and pick System: Then Power & Sleep:Scroll down: Open the drop-down menu and change the time or select Never. You can also do this through the Control Panel:Closing the lid will still put the computer to sleep. If your computer is part of an organization, you might still have to login if their network logs you out after a given period of inactivity.Two More Things Here are a couple of links about getting bash (unix/linux) working on your Windows 10 machine, if you want: https://lifehacker.com/how-to-get-started-with-the-windows-subsystem-for-linux-1828952698 https://docs.microsoft.com/en-us/windows/wsl/install-win10 https://docs.microsoft.com/en-us/windows/wsl/faq Here are instructions for getting a God Mode folder: https://www.howtogeek.com/402458/enable-god-mode-in-windows-10/ [Show More]
Last updated: 1 year ago
Preview 1 out of 30 pages
Buy this document to get the full access instantly
Instant Download Access after purchase
Add to cartInstant download
We Accept:

Reviews( 0 )
$9.00
Document information
Connected school, study & course
About the document
Uploaded On
Jan 19, 2020
Number of pages
30
Written in
Additional information
This document has been written for:
Uploaded
Jan 19, 2020
Downloads
0
Views
104


