Computer Networking > QUESTIONS & ANSWERS > Data Communications and Networking 3 (All)
Data Communications and Networking 3
Document Content and Description Below
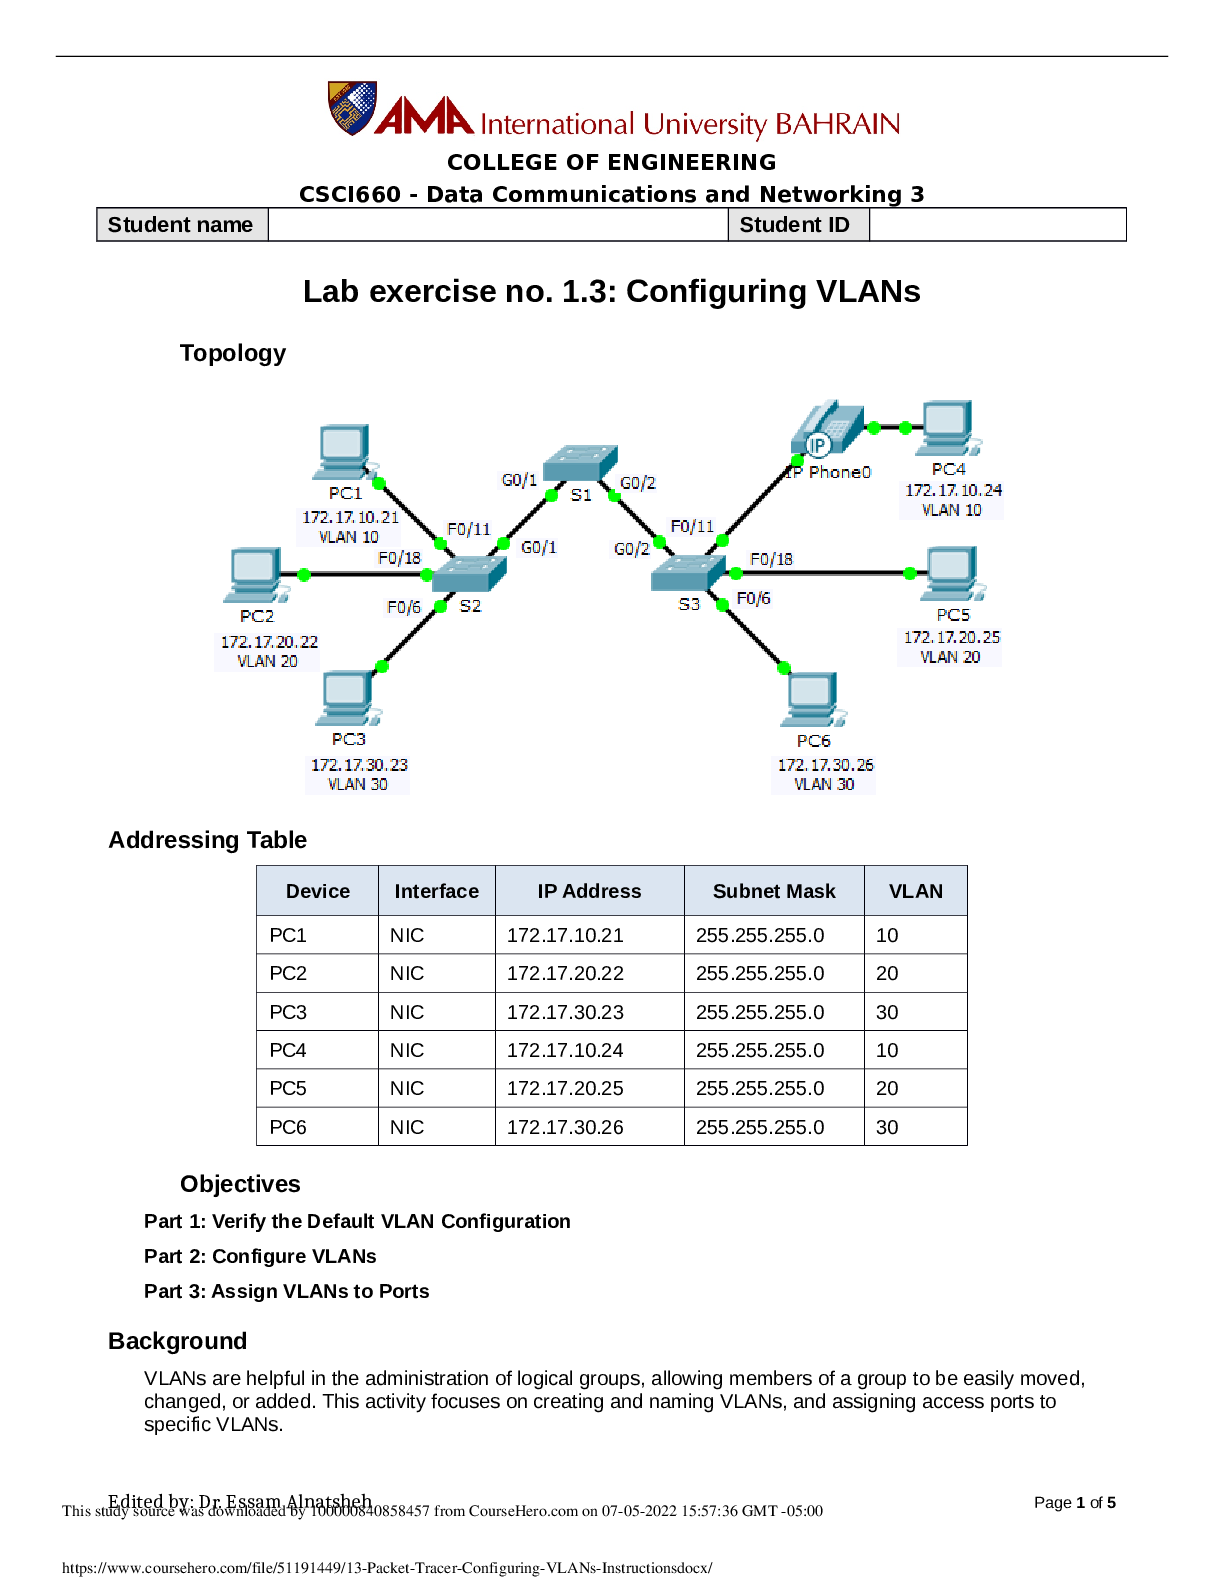
Lab exercise no. 1.3: Configuring VLANs Topology Addressing Table Device Interface IP Address Subnet Mask VLAN PC1 NIC 172.17.10.21 255.255.255.0 10 PC2 NIC 172.17.20.22 255.255.255.0 20 PC3 NIC... 172.17.30.23 255.255.255.0 30 PC4 NIC 172.17.10.24 255.255.255.0 10 PC5 NIC 172.17.20.25 255.255.255.0 20 PC6 NIC 172.17.30.26 255.255.255.0 30 Objectives Part 1: Verify the Default VLAN Configuration Part 2: Configure VLANs Part 3: Assign VLANs to Ports Background VLANs are helpful in the administration of logical groups, allowing members of a group to be easily moved, changed, or added. This activity focuses on creating and naming VLANs, and assigning access ports to specific VLANs. Page 1 of 5 Configuring VLANs Part 1: View the Default VLAN Configuration Step 1: Display the current VLANs. On S1, issue the command that displays all VLANs configured. By default, all interfaces are assigned to VLAN 1. Step 2: Verify connectivity between PCs on the same network. Notice that each PC can ping the other PC that shares the same network. PC1 can ping PC4 PC2 can ping PC5 PC3 can ping PC6 Pings to PCs in other networks fail. [Show More]
Last updated: 1 year ago
Preview 1 out of 5 pages
Instant download
Buy this document to get the full access instantly
Instant Download Access after purchase
Add to cartInstant download
Reviews( 0 )
Document information
Connected school, study & course
About the document
Uploaded On
Sep 26, 2022
Number of pages
5
Written in

Additional information
This document has been written for:
Uploaded
Sep 26, 2022
Downloads
0
Views
62