Engineering > Experiment > LAB 3 Objective: (All)
LAB 3 Objective:
Document Content and Description Below
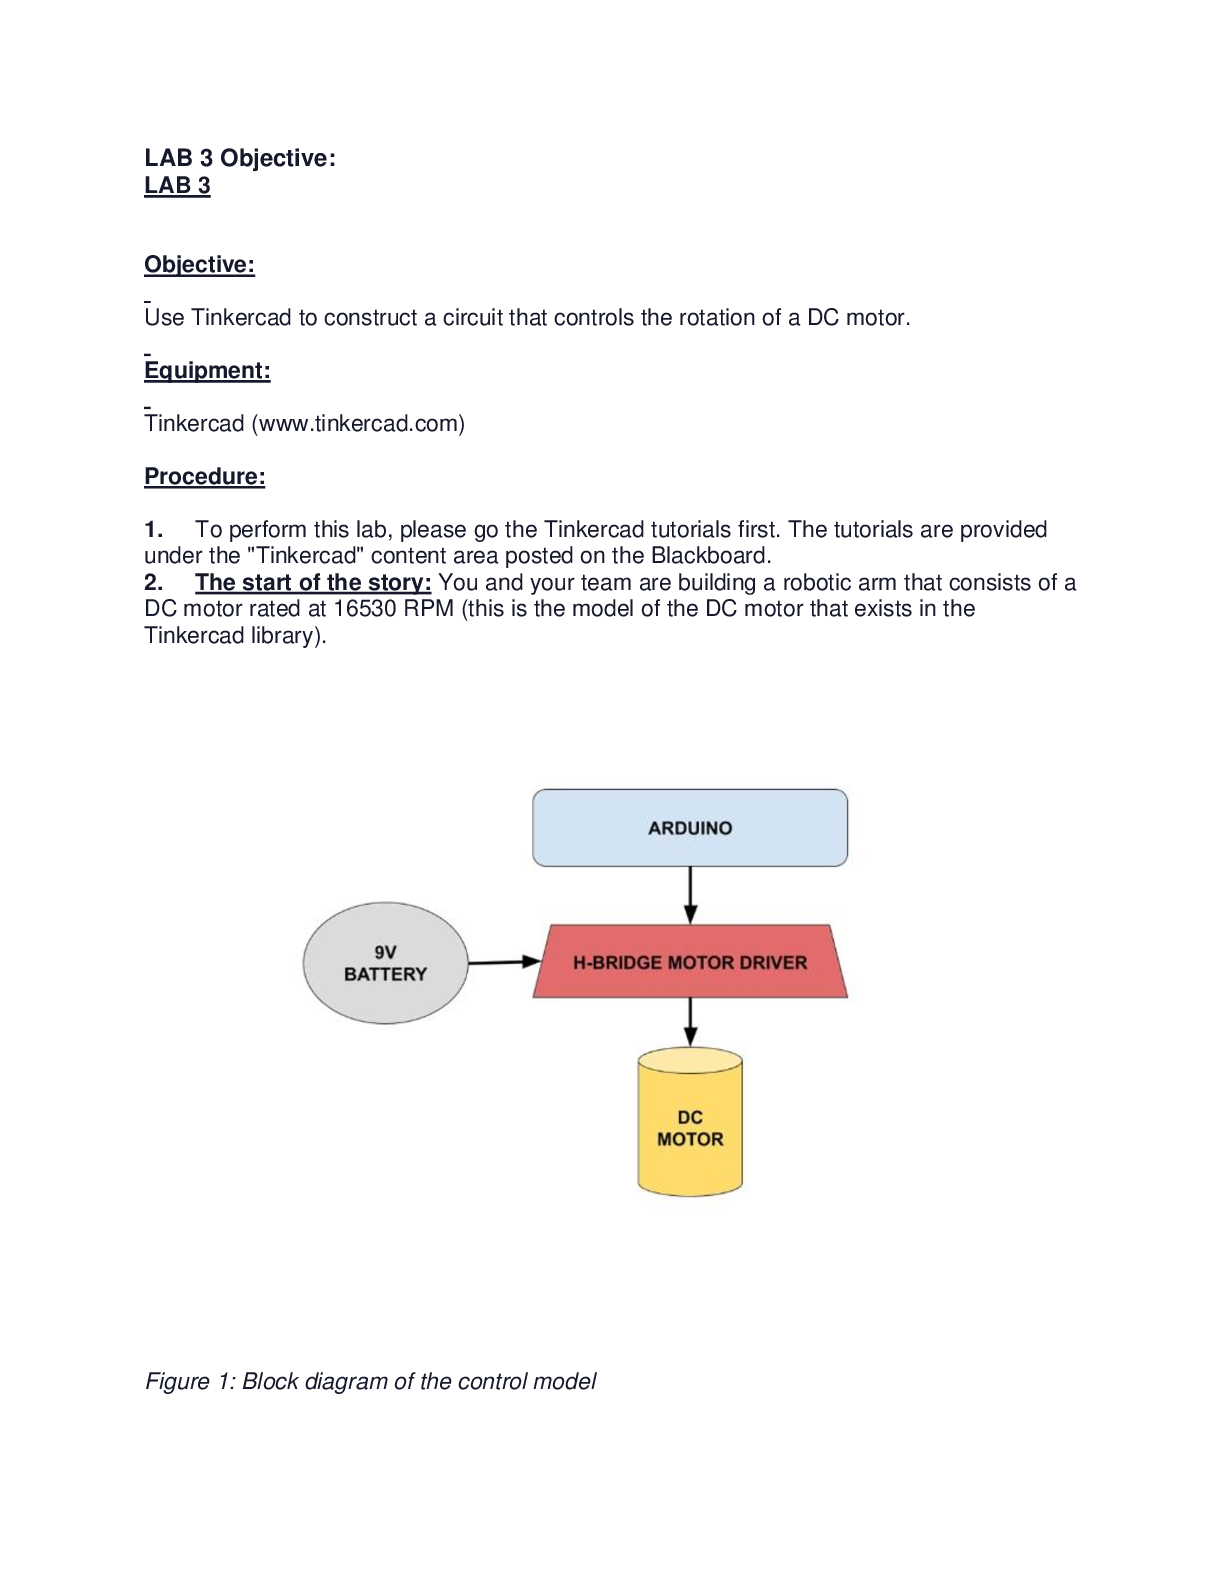
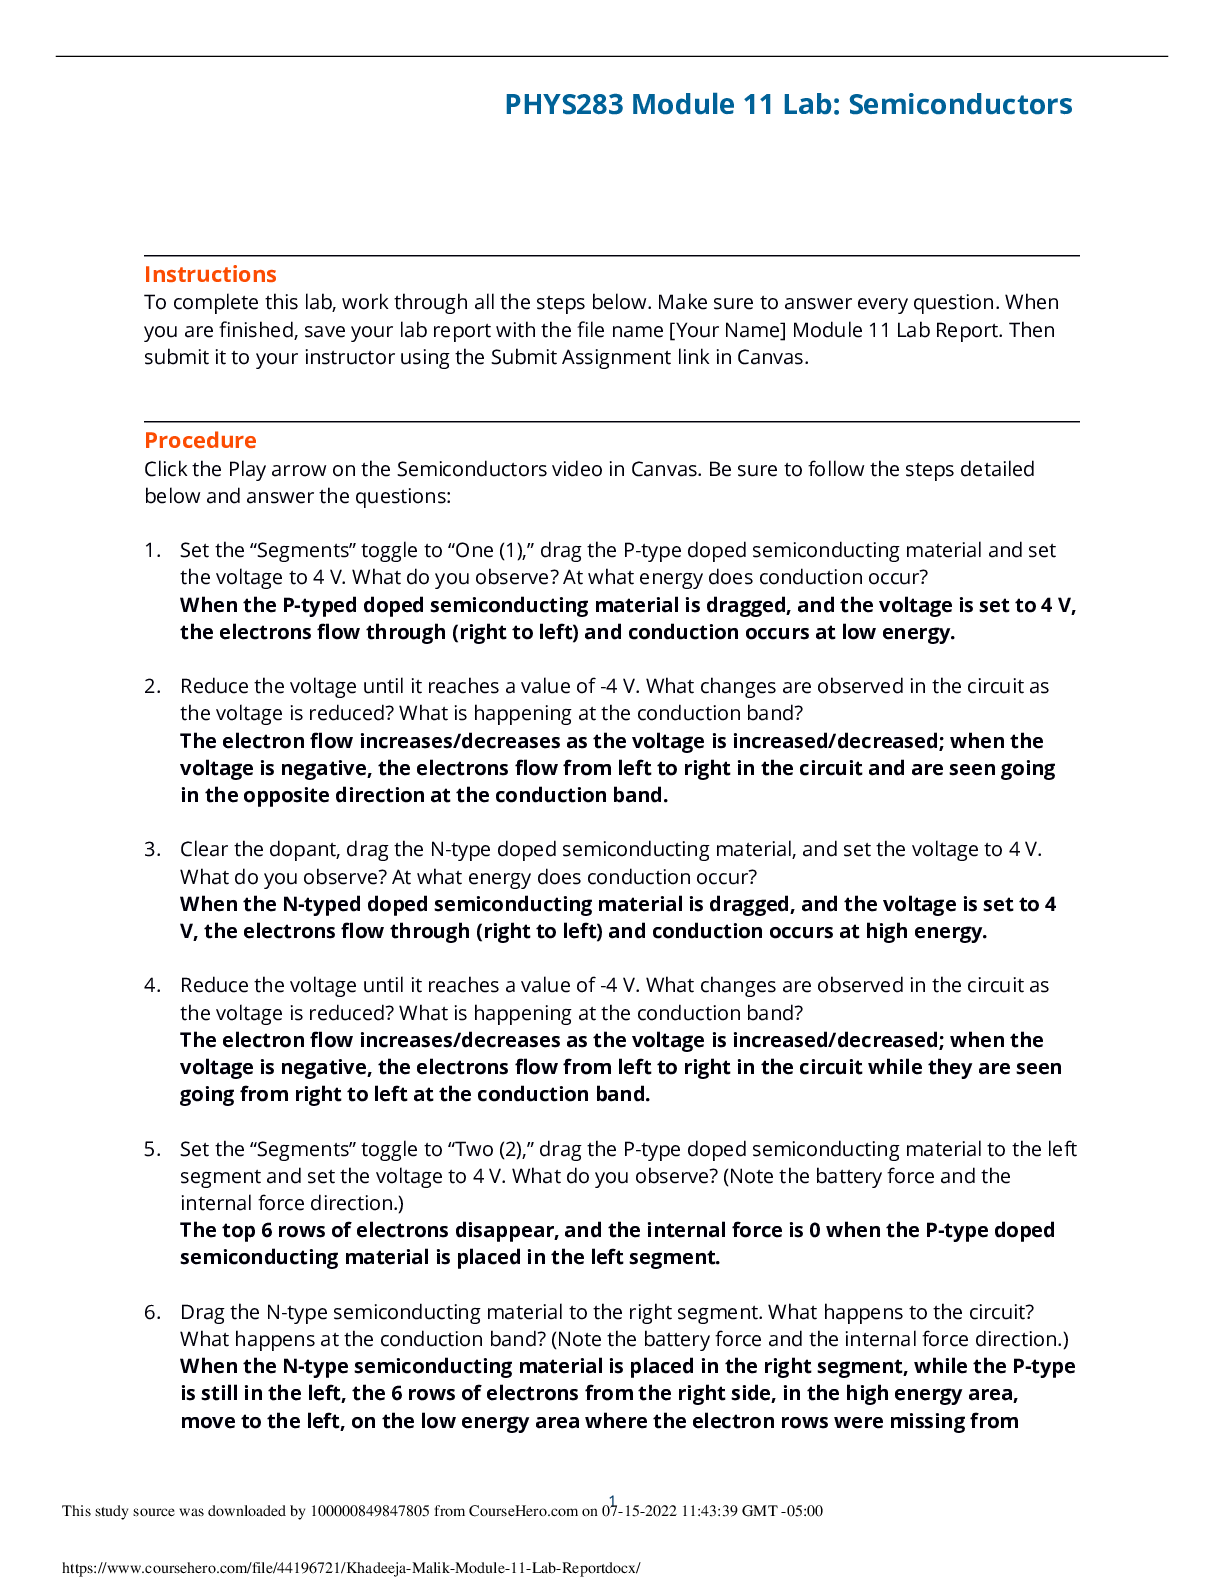
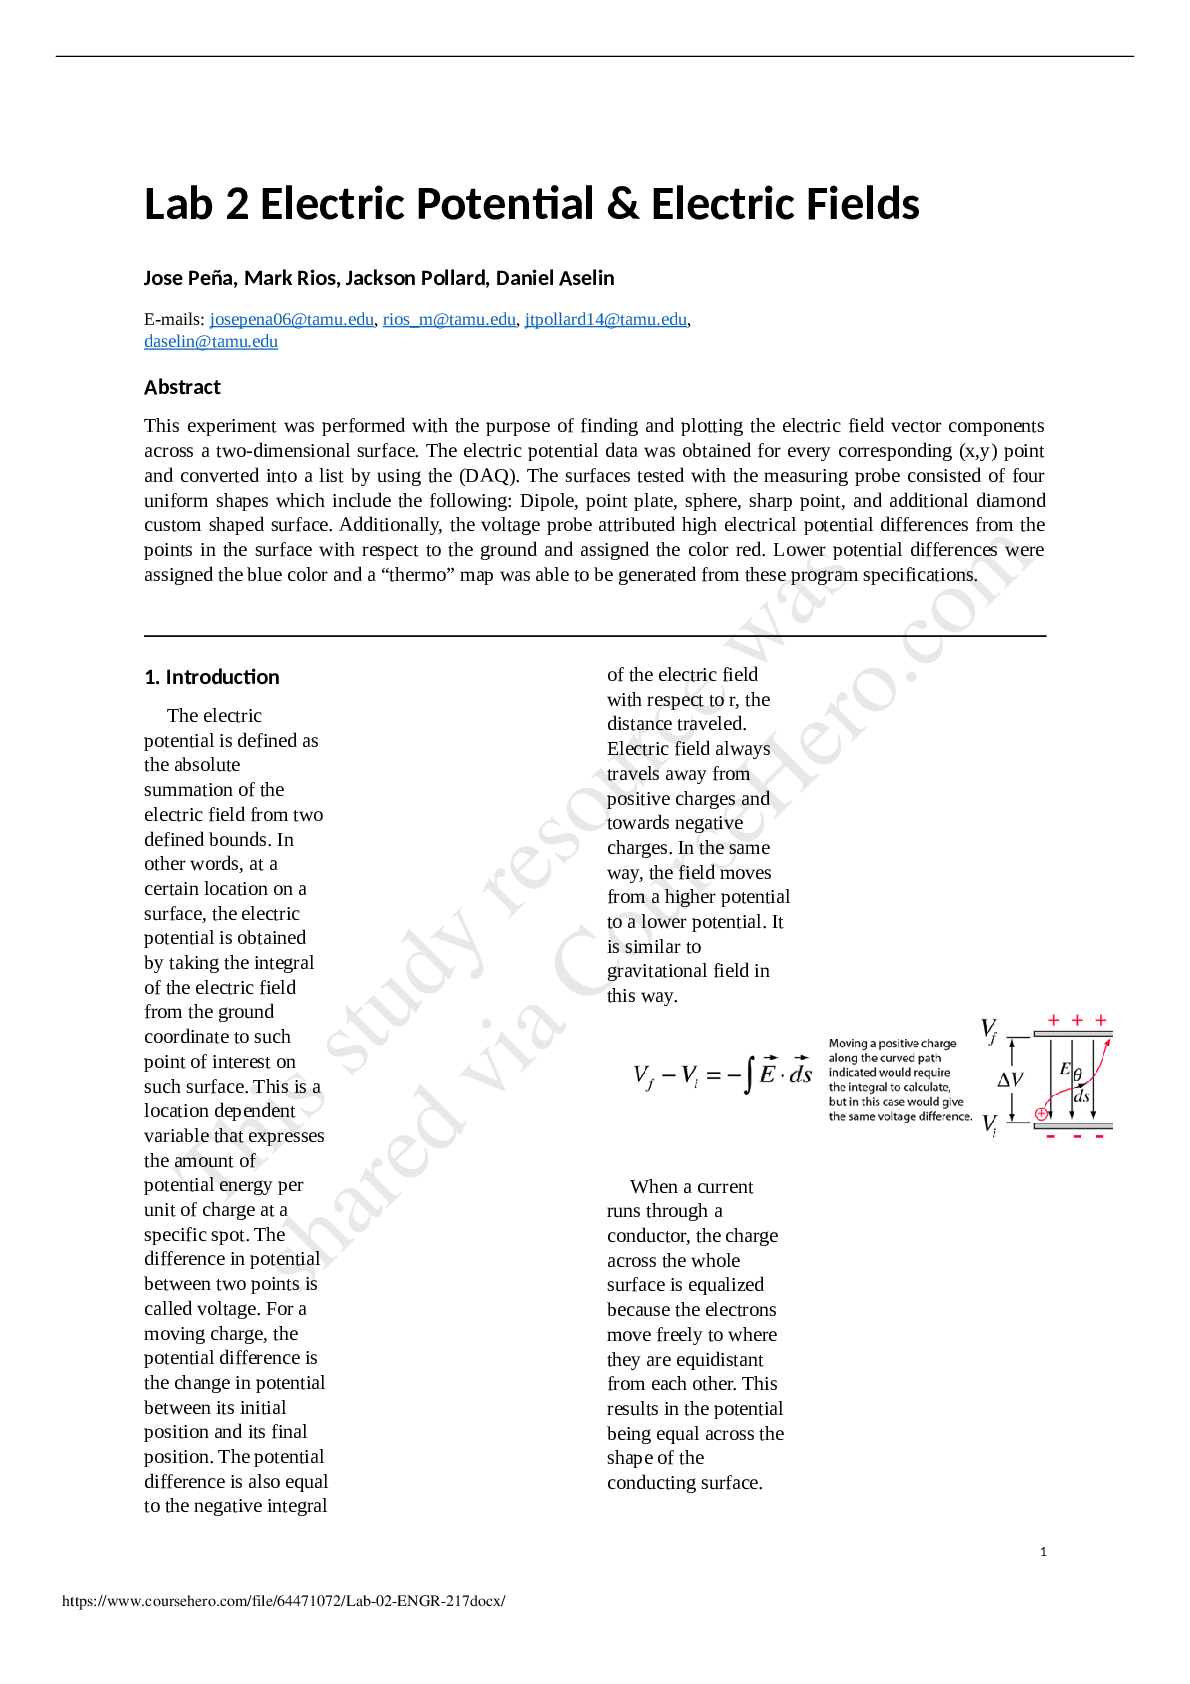
LAB 3 Objective: LAB 3 Objective: Use Tinkercad to construct a circuit that controls the rotation of a DC motor. Equipment: Procedure: 1. To perform this lab, please go the Tinkercad tutorials... first. The tutorials are provided under the "Tinkercad" content area posted on the Blackboard. 2. The start of the story: You and your team are building a robotic arm that consists of a DC motor rated at 16530 RPM (this is the model of the DC motor that exists in the Tinkercad library). Figure 1: Block diagram of the control model3. Create a new Tinkercad project in your provided account, and title it "Lab 3 - DC Control" 4. Build a circuit based on the block diagram shown in Fig. 1. This is the Tinkercad model of the situation presented in step 2. Here is more information on what an H-Bridge motor controller 5. Write a general code for the Arduino Uno R3 to run the DC motor at any desired RPM (speed). This means that: a. The Arduino takes an integer input from the Serial Monitor and converts it to its corresponding PWM (Pulse-Width Modulation) number using the "map()" function. b. It then sends this PWM number to the DC motor using the "analogWrite()" command through the H-Bridge driver. Question 1: What do you think is the maximum PWM value? Why? Please explain in detail. c. The result is that the DC motor rotates at an RPM of approximately the input integer (the RPM is shown on the rotating motor). The input integer and the PWM number sent to the H-Bridge should be displayed in the Serial Monitor LAB 5 Objective: Use Tinkercad to advance the control of DC Motors using sensors. Equipment: Procedure: ~Part I~ 1. Duplicate your Tinkercad project from Lab 3 and rename the duplicate to "Lab 5: Drill". This part will be done here. 2. The story comes to a halt: You and your team conclude that this motor rotates at very high RPM values, and therefore it may not be a good fit for a robotic arm; especially that the motion of the motor is continuous. Thus, you decide to use what you have built for another application: an automatic industrial drill. 3. Revise your circuit based on the block diagram shown in Figure 1.ARDUINO UNO R3 9V H-BRIDGE MOTOR DRIVER BATTERY ULTRA- SONIC SENSOR DC MOTOR Figure 1: Block diagram of the drill Note: You may use more than one breadboard if necessary. 4. To make a smart drill, you and your team decide to incorporate a safety measure, where if an object is closer than 20 inches to a side of the drill, the drill turns off so as not to cause harm to the object. In this lab however, we will focus on detection of the left side of the drill. a. The drill will initially rotate at its maximum rating. Question 1 (Review): What is the maximum RPM and PWM of the Tinkercad DC Motor? b. When the Ultrasonic Sensor reads a distance of 20 inches or less, a message should be printed in the Serial Monitor, stating that an object is too close to the drill. After this, the motor should immediately turn off (reset to 0 RPM). c. Once completed, include a picture of your system and attach the code you used here.Your system must work properly before continuing to the next step. 5. Although the current feature of the drill is important, you and your team decide to add directionality to the drill, so that it can be used for both drilling and removing screws. a. This is an addendum to the previous system. All functionality relating to detecting the distance should not be changed. b. The drill will still initially rotate at its maximum rating; however the user should be able to simply change the direction of the motor. By entering the word "counterclockwise" into the Serial Monitor, the motor should rotate counterclockwise at its maximum rating. Additionally, by entering the word "clockwise" into the Serial Monitor, the motor should rotate clockwise at its maximum rating. Note: Feel free to change the names of the commands that change the direction of the motor. However, if you do, please make sure to include what your new commands are. c. Once completed, include a picture of your system and attach the code you used here. Answer & Explanation Solved by verified expert [Show More]
Last updated: 1 year ago
Preview 1 out of 13 pages
Reviews( 0 )
Document information
Connected school, study & course
About the document
Uploaded On
Oct 25, 2022
Number of pages
13
Written in

Additional information
This document has been written for:
Uploaded
Oct 25, 2022
Downloads
0
Views
80


.png)

.png)